Thursday, September 19, 2024

Performing URL-Based Load Testing with Azure Load Testing

Load testing is a crucial practice for enterprise APIs to ensure optimal performance under varying traffic conditions. Azure Load Testing, a fully managed service, helps evaluate the performance, scalability, and capacity of your applications, particularly APIs. It enables you to simulate high-scale traffic, uncover performance bottlenecks, and optimize system resilience.

Azure Load Testing allows you to create sophisticated load tests using tools like Apache JMeter while also offering the flexibility to perform URL-based load testing without the need for external tools.

In this article, I will demonstrate how to perform URL-based load testing for an API exposed through the Azure API Management service using Azure Load Testing. 

Configuration of Load Test

Go to your Azure Load Testing instance, click on "Test", and then select "Create a URL-based test" to begin setting up your load test.


Specify Test details


In Test plan section click on Add request


Enter the details of your API, including the endpoint URL and request method. Since my API retrieves Star Wars characters by their ID, I configured the id parameter as a variable, allowing the test to simulate different requests dynamically.


Next, I created a CSV file containing multiple rows with different id values to be injected into the id parameter of my API. To simulate an error scenario, I intentionally included an id value of 1500, which does not exist in my API. This helps evaluate how the system handles unexpected inputs and errors under load.


In the Load section, I configured key parameters such as the number of engine instances, concurrent users, and test duration. Since this test is for demonstration purposes only, I selected the minimum values to keep the load minimal while still assessing the API’s response behavior.


For monitoring purposes, I added relevant resources to my load test, allowing me to analyze their performance directly from the load test dashboard. Since my API Management instance and Application Insights are crucial for this test, I included them to gain deeper insights into API performance, request handling, and potential bottlenecks.


Next, I navigated to the Test Criteria section, where I defined success and failure conditions based on key performance metrics. I set the test to fail if:
  • The 90th percentile response time exceeds 1000ms
  • The error percentage is greater than 5%


Execution of Load Test

With the Load Test configuration complete, it's time to execute the test and analyze the results.


Here are the results I received from the load test.


I got following key statistics
  • Load
  • Duration
  • Response time
  • Error percentage
  • Throughput

The Load Test has failed because it didn’t meet the test criteria I set. Specifically, the error percentage surpassed the 5% limit.

Analysis of error requests using related resources

Since we've integrated Application Insights as a related resource, we can dive deeper into the analysis. Let's focus on the Failed Requests chart, which will provide insights into the specific requests that failed during the load test, helping us identify potential issues or bottlenecks in the API.


To further investigate, click on the Failed Requests chart in Application Insights, then select Drill into Logs and navigate to Failures.


The failure dashboard reveals that there were 9 "Not Found" (404) errors during the load test.


It tells me that there are no Star Wars characters with 1500 as the id


Tuesday, September 10, 2024

Debugging API Startup Errors Using Kudu in Azure App Service

Recently, I had to debug a .NET API hosted in an Azure Web App. The API failed to bootstrap and returned only a generic error message, which provided little insight into the issue.

Unfortunately, the application lacked Application Insights integration, making the troubleshooting process even more challenging.

Following is the approach I took.

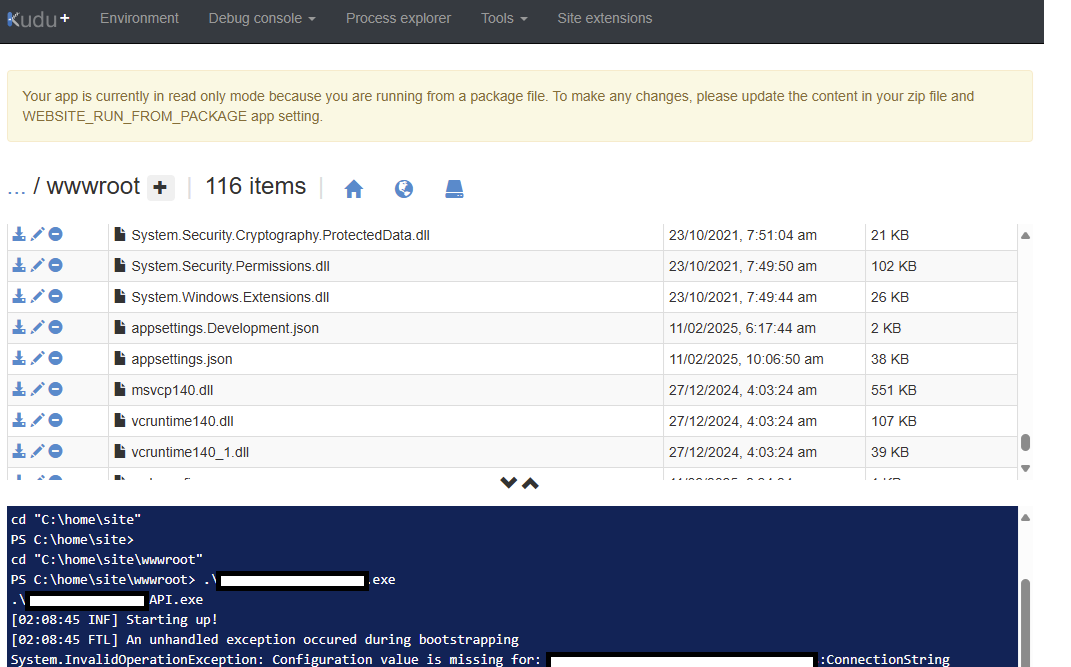
I navigated to the Development Tools section of the App Service and accessed Advanced Tools to investigate further.


From there, I navigated to Kudu and accessed the Debug Console to further analyze the issue.


Navigate to wwwroot location and locate the particular exe of your API


I executed the .exe file directly in the Debug Console to capture the specific error message and identify the root cause of the issue.


By running the .exe file, I was able to see the detailed error message, which revealed that a required configuration item was missing for the application.

Saturday, September 7, 2024

Configuring Postman to Retrieve an OAuth 2.0 Token from Entra ID for Calling an API via APIM

This article is the second part of a two-part series. Below are the different parts of this article series.


In this article, I will guide you through configuring your Postman client to retrieve an access token from Entra ID, enabling you to call an API exposed via APIM.

For better organization, I have grouped related APIs into a collection.


Navigate to Authorization section and provide following details


You can obtain most of the required details from your client App Registration. These parameters are readily available in the Endpoints view of your client application. We covered how to create and configure a client App Registration in our previous blog post.


Following are some important parameters

#Auth URL
OAuth 2.0 authorization endpoint (v2) in the Endpoints view of your client app registration

#Access Token URL
OAuth 2.0 token endpoint (v2) in the Endpoints view of your client app registration

#Client ID
Client ID of your client app registration

#Client Secret
#Client ID
Client secret you generated within your client app registration

#Callback URL
Redirect URL from the Authentication section (Shown in below diagram)


That completes the configuration. You can now click the Get New Access Token button to interactively retrieve an access token.


Next, ensure that your API is configured to retrieve the token from the parent as shown below.


Then, you can successfully retrieve response with valid access token


Wednesday, August 21, 2024

Using Azure's Diagnose & Solve Problems Feature to Troubleshoot Cloud Issues

You might encounter errors in your Azure cloud workloads and take various measures to resolve them. However, Azure provides built-in assistance through the Diagnose & resolve problems feature.

The Diagnose & solve problems feature in Azure is an intelligent troubleshooting tool designed to help users identify and resolve issues.

Here is an instance where I used this feature to troubleshoot a connectivity issue with an Azure Storage Account firewall.

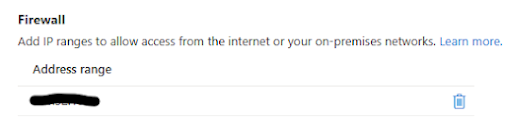
I enabled the firewall on my storage account to restrict access to a specific public IP address.


And I have whitelisted my public IP address as shown below


Despite configuring it as mentioned above, I still encountered the following error when I tried to access the container. This is when I used the Diagnose & solve problems feature.


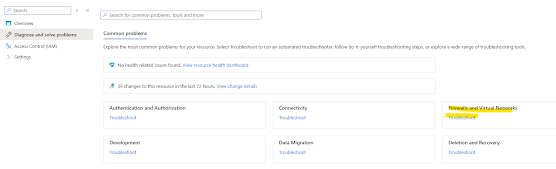
I selected Firewalls & Virtual Networks section


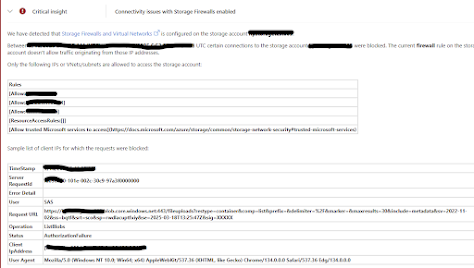
Next I selected Connectivity issues after enabling storage firewall


Here is the final response I received, which revealed that I had whitelisted the wrong IP address.


This allowed me to resolve the issue very quickly

Tuesday, August 13, 2024

Securing Backend API Using OAuth2 with Entra ID and Azure API Management

In this article, I will demonstrate how to use Azure API Management (APIM) features to secure an API that lacks authentication or authorization. 

This article is the first part of a two-part series. Below are the different parts of this article series.

Legacy APIs often do not have built-in security mechanisms, and updating them may be either impractical or too costly. In such cases, securing them through Azure API Management provides an effective solution.

The solution consist of four steps:
  1. Configuration of Entra ID App Registrations
  2. Configuration of APIM OAuth2 service
  3. Configuration of OAuth 2 settings within the API in APIM
  4. Test using the Test console
1.Configuration of Entra ID App Registrations

App registrations in Microsoft Entra ID are a way to register applications so they can integrate with Microsoft's identity platform. This process establishes a trust relationship between the application and the identity provider, enabling secure authentication and authorization.

We need to create two App Registrations in Azure Active Directory:
  • One for the backend API that we are securing.
  • Another for the client that will call our API, which could be the APIM Developer Portal or Postman.
In the next article, I will provide a detailed walkthrough on how to connect the client App Registration with Postman for authentication and testing.

Here is the process I followed:

Use default options to create App registrations. Keep the redirect URL blank


Next, navigate to the backend app registration  and add a scope under the Expose an API section. This defines the permissions that clients must request to access the API securely.


Next, navigate to the client app registration and assign the previously created scope under the API permissions section. 


After adding the permission, grant admin consent to ensure the client can request and use the assigned scope when calling the API.


Next, within the client app registration, navigate to the Certificates & secrets section and create a client secret. Once generated, be sure to copy and securely store the secret, as it won’t be visible again. Using Azure Key Vault is a recommended approach for securely storing and managing the client secret.


We need to configure the callback URL in our client app registration. But first, we must generate this URL within the OAuth 2.0 service in APIM. Once generated, this URL should be added to the Redirect URIs section in the client app registration. We will discuss that within the next section.

2.Configuration of APIM OAuth2 service

In our API Management instance, we need to create an OAuth 2.0 service, which will interact with our App Registrations to retrieve an access token. This service acts as the bridge between API Management and Azure Active Directory, enabling secure authentication and authorization for API requests.

Navigate to our API Management instance and select OAuth 2.0 + OpenID Connect section under the developer portal.


Following is the format of configuration parameters.

#Authorization endpoint URL
https://login.microsoftonline.com/<Tenant ID>/oauth2/v2.0/authorize

#Token endpoint URL
https://login.microsoftonline.com/<Tenant ID>/oauth2/v2.0/token

You can get these values from your client app registration


Copy the Authorization Code Grant flow URL generated in the OAuth2 service within API Management, and paste it into the Redirect URI section of the client app registration . This ensures that after successful authentication, Azure AD can redirect the authorization response back to API Management

APIM OAuth 2.0 service Redirect URL is shown below


Authentication section in client app registration is shown below


3.Configuration of OAuth 2 settings within the API in APIM

Go to the Settings section of your API within API Management (APIM) and select the OAuth 2.0 service you previously created. This associates the API with the authentication flow.


This completes the basic OAuth 2.0 configuration. However, to enhance security, we can take an additional step by adding token validation in our API operation using an APIM policy.

Navigate to the Inbound processing section and open policy code editor
    <inbound>
        <base />
        <validate-jwt header-name="Authorization" failed-validation-httpcode="401" failed-validation-error-message="Unauthorized. Access token is missing or invalid.">
            <openid-config url="https://login.microsoftonline.com/<YOURTENANTID>/v2.0/.well-known/openid-configuration" />
            <required-claims>
                <claim name="aud">
                    <value>319aa8ca-f607-45c3-ac83-e3a510666883</value>
                </claim>
            </required-claims>
        </validate-jwt>
    </inbound>

4.Test using the Test console

You can now test the OAuth 2.0 flow within the Test Console or the Developer Portal. In the Test Console, add the Authorization header and provide a valid access token to simulate an authenticated API request.


Sunday, August 4, 2024

Presentation - API Security: Essential Practices for Developers

Recently I did a presentation for a local community on how to implement secure APIs. Following is the presentation I conducted


Tuesday, July 30, 2024

Mentorship - Mentoring Circle for Microsoft Data & AI Bootcamp

I had the privilege of participating in the mentorship circle for the Microsoft Data & AI Bootcamp on July 12th. The students were incredibly enthusiastic and eager to learn new technologies