This article is a continuation of my previous Post
With this article I'll explain how to notify users when a metric has reached a threshold value. In this example I will fire an email when the temperature exceeds 25c.
For this example also I'm using Raspberry Pi Azure IoT Online Simulator. (Kudos to the developers !!)
In order to accomplish the task I need to cover following area
- Configuration of IOT Hub to receive telemetry (Covered in previous post)
- Creation of logic app to filter out relevant telemetry and notify
- Connect IOT hub to Event Grid which uses WebHook to transfer IOT telemetry
Will start with the first part. Following are the steps I used create the logic app
Creation of Logic App
Step 1: Select when a HTTP request is received trigger
Click on Use sample payload to generate the schema link
Since we are expecting the telemetry payload, provide the following. You can get more information Here
{
"body": [
{
"id": "a68df6bc-0fa3-16b1-fbfb-0f00c7677708",
"topic": "/SUBSCRIPTIONS/AFC2F241-D12F-45C5-9791-72A633F51345/RESOURCEGROUPS/CONTOSO-RESOURCE/PROVIDERS/MICROSOFT.DEVICES/IOTHUBS/CONTOSO-HUB",
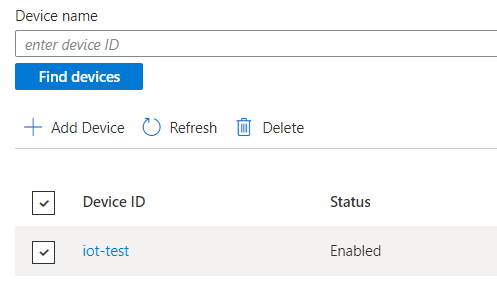
"subject": "devices/iot-test",
"eventType": "Microsoft.Devices.DeviceTelemetry",
"data": {
"properties": {
"temperatureAlert": "false"
},
"systemProperties": {
"iothub-connection-device-id": "iot-test",
"iothub-connection-auth-method": "{\"scope\":\"device\",\"type\":\"sas\",\"issuer\":\"iothub\",\"acceptingIpFilterRule\":null}",
"iothub-connection-auth-generation-id": "637795588618116304",
"iothub-enqueuedtime": "2022-02-05T14:02:38.4880000Z",
"iothub-message-source": "Telemetry"
},
"body": "eyJtZXNzYWdlSWQiOjkwLCJkZXZpY2VJZCI6IlJhc3BiZXJyeSBQaSBXZWIgQ2xpZW50IiwidGVtcGVyYXR1cmUiOjI2LjY2NDI1NDk5NDIyNzg1NywiaHVtaWRpdHkiOjY0LjQ2NDk5OTA1NjMwMDY3fQ=="
},
"dataVersion": "",
"metadataVersion": "1",
"eventTime": "2021-02-05T14:02:38.488Z"
}
]
}

Step 2: This payload is retrieved as an array. We need to get the first item from the array in order to process
First we will initialize a variable and set value from the output from our POST Body.

Step 3: Again we will initialize a variable and use previously created variable and get the first element

Step 4: We will use the Parse JSON activity, and parse Body_Param variable. We use following JSON body to generate the schema
{
    "id": "a68df6bc-0fa3-16b1-fbfb-0f00c7677708",
    "topic": "/SUBSCRIPTIONS/AFC2F241-D12F-45C5-9791-72A633F51345/RESOURCEGROUPS/CONTOSO-RESOURCE/PROVIDERS/MICROSOFT.DEVICES/IOTHUBS/CONTOSO-HUB",
    "subject": "devices/iot-test",
    "eventType": "Microsoft.Devices.DeviceTelemetry",
    "data": {
        "properties": {
            "temperatureAlert": "false"
        },
        "systemProperties": {
            "iothub-connection-device-id": "iot-test",
            "iothub-connection-auth-method": "{\"scope\":\"device\",\"type\":\"sas\",\"issuer\":\"iothub\",\"acceptingIpFilterRule\":null}",
            "iothub-connection-auth-generation-id": "637795588618116304",
            "iothub-enqueuedtime": "2022-02-05T14:02:38.4880000Z",
            "iothub-message-source": "Telemetry"
        },
        "body": "eyJtZXNzYWdlSWQiOjkwLCJkZXZpY2VJZCI6IlJhc3BiZXJyeSBQaSBXZWIgQ2xpZW50IiwidGVtcGVyYXR1cmUiOjI2LjY2NDI1NDk5NDIyNzg1NywiaHVtaWRpdHkiOjY0LjQ2NDk5OTA1NjMwMDY3fQ=="
    },
    "dataVersion": "",
    "metadataVersion": "1",
    "eventTime": "2021-02-05T14:02:38.488Z"
}

Step 5: The telemetry field is in "body" field. Now we need to retrieve it. Again we will initialize another variable to hold the field
Step 6: Now we need to work with the telemetry string. Which is also a JSON. In order to do it first initialize a new variable. We need this to hold the later decoded value

Step 7: Our telemetry field is base64 encoded. for an example we get a value like this
"body": "eyJtZXNzYWdlSWQiOjkwLCJkZXZpY2VJZCI6IlJhc3BiZXJyeSBQaSBXZWIgQ2xpZW50IiwidGVtcGVyYXR1cmUiOjI2LjY2NDI1NDk5NDIyNzg1NywiaHVtaWRpdHkiOjY0LjQ2NDk5OTA1NjMwMDY3fQ=="
We can use an online base64 decoder to check

We can use expression to to decode

Step 8: Then we will parse the telemetry JSON string.
We can use following to generate the schema
{
  "messageId":90,
  "deviceId":"Raspberry Pi Web Client",
  "temperature":26.664254994227857,
  "humidity":64.46499905630067
}

Step 9: Now comes to the interesting part. Now we will evaluate the value of the temperature. If it is larger than 25, we need to send an alert. We use If/Else branch to evaluate the condition

Step 10: We can use an email service to send an email. I use Gmail provider. We can construct the body of the email as we wish

That's all we have to do from Logic App side. Let's save it
Connect IOT Hub to Event Grid and use WebHook to connect to Logic App
Step 1: Navigate to IOT Hub and click on Events. Then click on Event Subscription

Step 2: Create Event Grid Subscription and Select
- Device Telemetry event type
- WebHook for the endpoint

What would be the url of our endpoint. Easy! We will navigate to our logic app and HTTP request action. Our endpoint URL is there

We will specify that URL for the WebHook

That's it.
Let's try this out

We can check from our logic app overview to see if it succeeded

Great!! Let's see if I got any email alert

That's all. Hope I covered everything here :)