I presented regarding ALM with SharePoint in SharePoint Sri Lanka Forum on 10th January 2018.
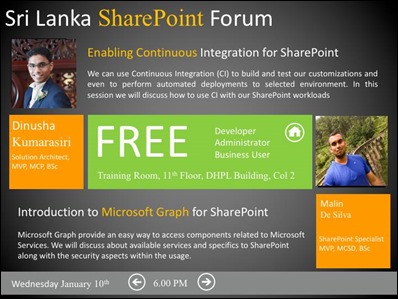

Following is the presentation I did
I presented regarding ALM with SharePoint in SharePoint Sri Lanka Forum on 10th January 2018.
Following is the presentation I did
This is the third part of the article series on how to manage SharePoint Framework solution in a team environment
In this blog post I’ll explain how to automate build and release process for SharePoint Framework solutions. This uses ALM API which was released recently.
Configure Solution
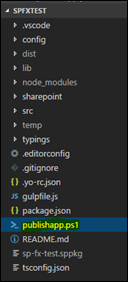
Add following script to the root of the solution. This script will retract if previous version of the solution already exists. Then it will add the solution to App Catalog site and then to the SharePoint site that you wish your customization to be published.
Param(
[string]$username,
[string]$password
)
$packagePath = ".\release\sharepoint\solution\sp-fx-test.sppkg"
$encpassword = convertto-securestring -String $password -AsPlainText -Force
$cred = new-object -typename System.Management.Automation.PSCredential -argumentlist $username, $encpassword
Connect-PnPOnline -Url "https://dinushaonline.sharepoint.com/sites/dev" -Credentials $cred
$appExist = Get-PnPApp | ? { $_.Title -eq 'SPFxTest' }
if ($appExist -ne $null) {
Uninstall-PnPApp -Identity $appExist.Id
Unpublish-PnPApp -Identity $appExist.Id
Remove-PnPApp -Identity $appExist.Id
}
Add-PnPApp -Path $packagePath -Publish -Overwrite
$appAfterAdd = Get-PnPApp | ? { $_.Title -eq 'SPFxTest' }
Publish-PnPApp -Identity $appAfterAdd.id
Install-PnPApp -Identity $appAfterAdd.id
Configure Build
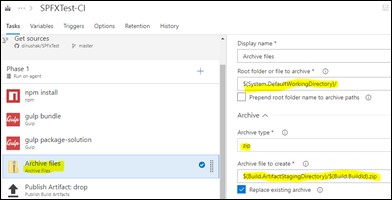
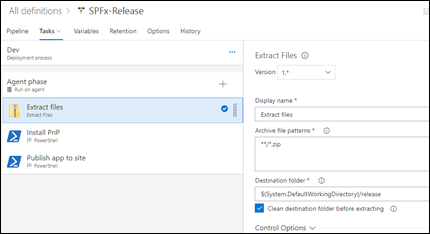
Create a new build definition in your TFS Online environment to perform continuous integration
We have to perform npm install, gulp bundle, ship and archive steps in following steps
Configure Release
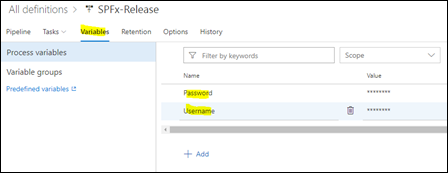
Create variables for SharePoint online username and password which will be used in publishapp.ps1 script
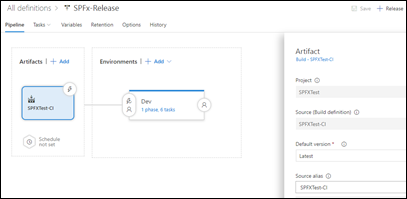
Enable Continuous Deployment
This step will be used to automatically trigger a release as soon as a build is succeeded
Recently I wanted to have a VPN connectivity to one of my SharePoint server farms hosted in Microsoft Azure. Although Microsoft Azure provides VPN gateway options, they were not suitable to this scenario.
Following are the steps I used to configure OpenVPN server
1. Provision Ubuntu VM
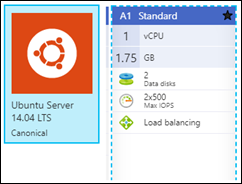
2. Configure DNS name for the public IP
3. Configure Inbound Security Rule
4. Connect to VM using PuTTY, update and upgrade
5. Install OpenVPN
6. Configure OpenVPN
7. Download the client.ovpn file using FileZilla
8. Download and configure VPN client (Windows)
9. Place the downloaded ovpn configuration in “C:\Program Files\OpenVPN\config” directory
10. Connect using OpenVPN GUI
Now I’m able to create a VPN connection to my SharePoint environment hosted in Azure. I can access the environment using different platforms (Linux PC, Mobile devices, etc ..) by connecting via respective OpenVPN clients
When I executed “yo @microsoft/sharepoint” to generate a SharePoint extension, I got following error message
Attempt - 01
First I tried to uninstall and install SharePoint Framework Yeoman generator by executing following command
npm uninstall -g generator-@microsoft/generator-sharepoint
npm install -g @microsoft/generator-sharepoint
This could not resolve the issue
Attempt - 02
Tried uninstalling and installing both Gulp and Yeoman using following commands
npm uninstall -g gulp
npm uninstall –g yeoman
npm install -g yo gulp
Still the issue persisted
Attempt – 03 (Success!!)
npm uninstall -g gulp
npm uninstall –g yeoman
npm install -g yo gulp
npm install -g @microsoft/generator-sharepoint
That’s it.
Recently one of my customers asked whether we have SharePoint 2013 or 2016 in SharePoint Online. This was due to the label “2013 experience version will be used” which is visible when creating new site collections.
It’s true that the following notification is bit confusing
What is the meaning of this message?
Currently a fork of SharePoint 2016 is being used in SharePoint Online. However it uses SharePoint 2013 compatibility level to avoid any compatibility issues in site templates.
How to check the current compatibility level?
Get-SPOSite -Identity https://dinushaonline.sharepoint.com/sites/dev -detailed |fl
How to check the currently installed SharePoint version?
Navigate to a SharePoint Online site and inspect Response Headers. 16.0.0.7514 means a SharePoint 2016 implementation
Conclusion
Currently we have SharePoint 2016 in SharePoint Online with SharePoint 2013 compatibility mode to avoid compatibility issues. Microsoft will gradually upgrade to SharePoint 2016 experience near future.
Have you heard about the virtual Collab365 Global Conference 2017 that’s streaming online November 1st – 2nd?
Join me and 120 other speakers from around the world who will be bringing you the very latest content around SharePoint, Office 365, Flow, PowerApps, Azure, OneDrive for Business and of course the increasingly popular Microsoft Teams. The event is produced by the Collab365 Community and is entirely free to attend.
Places are limited to 5000 so be quick and register now.
During the conference I'd love you to watch my session which is called : 'Rich single page applications with SharePoint'
There are lots of ways to develop applications on top of SharePoint. You can build full trust farm solutions, SharePoint add-ins or SharePoint framework based apps. But can we do customizations without limiting to any of these frameworks? In this session, I will explain how to build and package Single Page Applications (SPA) on top of SharePoint and embrace client-side technologies. Furthermore, I will explain how to involve continuous integration and unit testing whenever possible
If you join me, you will learn:
Topic(s):
Audience :
Time (in UTC) :
How to attend :
When you create a team, your SharePoint site collection will be provisioned under “sites” managed path by default.
How to create those site collections under “teams” path. It is easy.
Navigate to SharePoint Admin Center in Office365
Navigate to Settings
Do the adjustment under Site Creation section